Establishing a germ-free home environment has never been more crucial to our health and well-being. With viruses and bacteria surviving on household surfaces for hours or even days, having a clean living space is crucial to preventing illness and ensuring overall wellness. The unseen dangers on doorknobs, countertops, and personal items need daily attention and regular deep cleaning to successfully control.
This blog looks at day-to-day practical strategies to guard your living area against dangerous microorganisms, merging common practices with professional techniques to ensure your home remains safe and healthy.
Essential Daily Cleaning Habits to Keep Germs Away
Building a defense against germs starts with regular daily routines. Here are a few to keep in mind.
Wipe Down High-Touch Surfaces
High-touch surfaces are top offenders when it comes to germ spreading, and they need to be cleaned often. Doorknobs, light switches, remote controls, and electronic gadgets need to be wiped with disinfecting wipes or proper cleaners every day.
Cleaning Kitchen & Bathroom
Kitchen and bathroom spaces require extra care because they are more humid and have food particles. A disinfecting cleaner for the kitchen countertops is a must after food preparation, particularly after the preparation of raw meat or vegetables.
Correct Hand Hygiene
Good hand hygiene continues to be our most effective measure for preventing germ passing. Our guideline is to wash the hands for 20 seconds or longer with soap and warm water, especially after going outdoors, prior to eating, and after utilizing the restroom.
Strategic Sanitizing
Your home’s entry points also need strategic sanitizing. Create a “contamination zone” at your entry point where outdoor shoes, bags, and new purchases can be sanitized before taking them further into your living area.
The Best Cleaning Products to Kill Germs & Viruses
When it comes to effectively killing harmful microorganisms, not all cleaning agents are the same. Here are the best cleaning products to use at your home:
Disinfectants
To provide maximum protection, we suggest using EPA-registered disinfectants that are specifically designed to kill viruses and bacteria. Use products with quaternary ammonium compounds, hydrogen peroxide, or bleach solutions, which have established efficacy against a broad spectrum of pathogens.
Natural Alternatives
For those who like natural alternatives, some household items can be effective if used properly to keep your home safe and even smelling fresh. Distilled white vinegar (5% acetic acid) is useful for general cleaning and has antimicrobial activity, but it is not as good against all viruses as commercial disinfectants.
Make it Effective
Proper application is important when using disinfectants. A “dwell time” is needed for most disinfectants – the surface should be visibly wet for several minutes to let the active ingredients take effect.
Best Brands
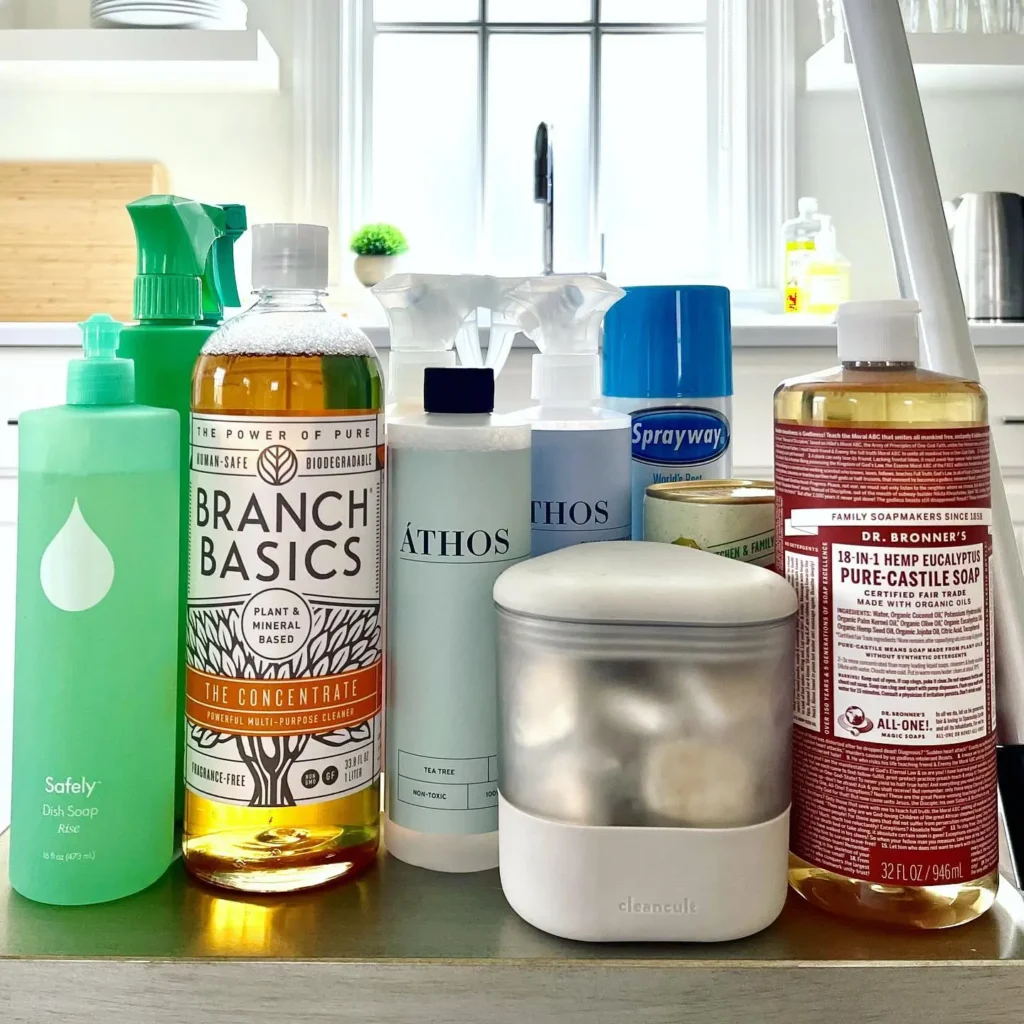
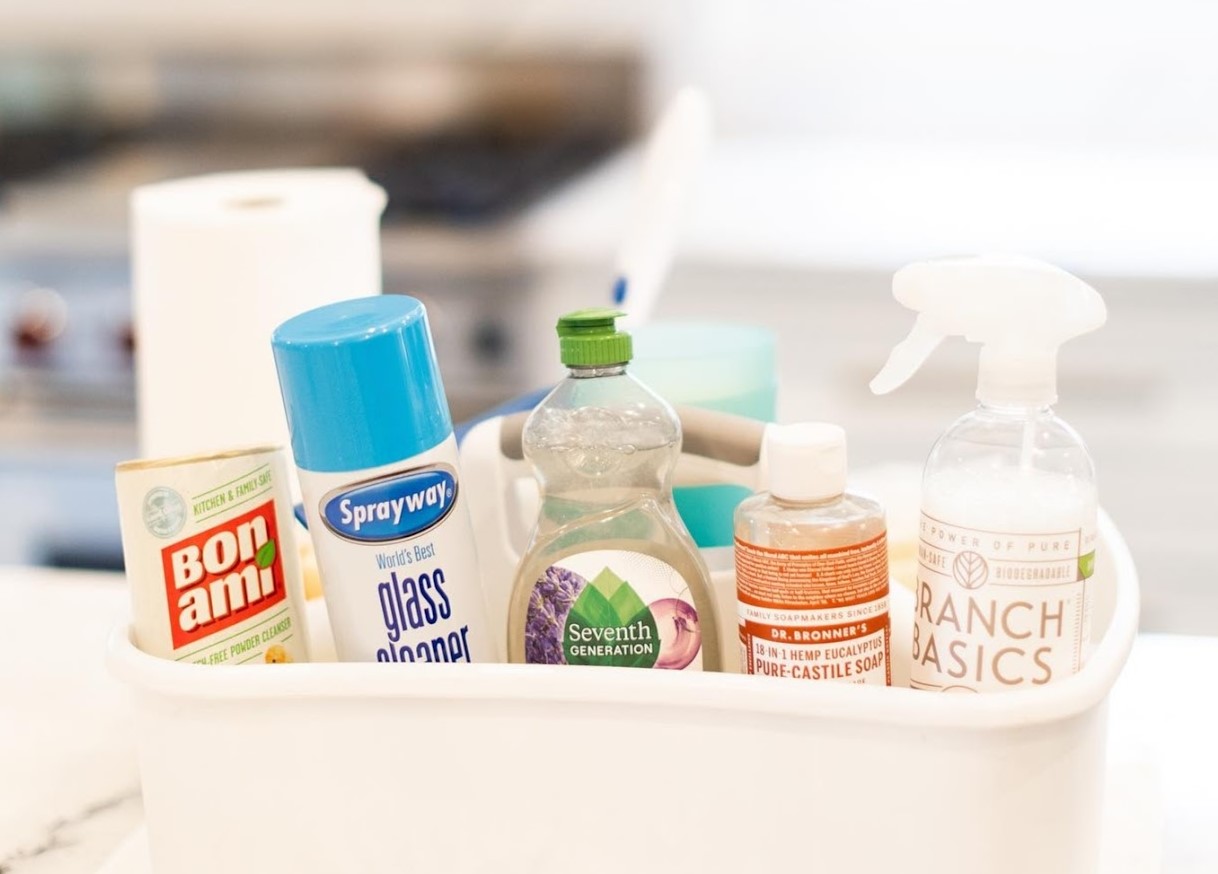
For healthy results without harsh chemicals, brands such as Bon Ami can efficiently clean stainless steel surfaces and remove rust without compromising protective coats. In cases of stubborn grime in the kitchen or bathroom build-up, Branch Basics provides plant-based options that clean efficiently while being kind to surfaces and safer for families with pets and children.
How to Disinfect High-Traffic Areas in Your Home
Kitchen
The kitchen needs careful attention since it involves food preparation and a lot of touching. Countertops must first be washed with soap and water to get rid of visible dirt, and then disinfected afterward.
Bathrooms
Disinfect the toilet handles, faucets, and doorknobs every day in bathrooms. Shower curtains and bath mats may mildew and should be washed regularly. Disinfect bathroom surfaces more often when someone in the home is ill to help keep the illness from spreading.
Living Rooms
Living rooms collect dust and germs from everyday use. Remote controls, video game controllers, and family tablets should be cleaned regularly with proper electronics-safe cleaning products.
Bedrooms
Bedrooms need extra care for bedding and soft furnishings. We suggest washing sheets once a week in hot water to eliminate dust mites and bacteria. Pillows need to be washed every 3-6 months, and mattresses can be vacuumed and spot-cleaned every quarter.
Air Quality & Ventilation – Key to a Healthy Home
Proper ventilation and airflow are indispensable but under-emphasized parts of a safe home environment. Indoor air contains more pollutants at higher concentrations compared to outdoor air, and as such, it is necessary for ventilation to diminish airborne germs and enhance general air quality.
Utilize Air Purifiers with HEPA Filters
Air cleaners with HEPA filters will trap as small as 0.3-micron particles, many bacteria, and some viruses. Place those in high-traffic locations or bedrooms for optimal effect. Be sure to replace filters as recommended by the manufacturer to be effective.
Routine HVAC Maintenance
Your HVAC system is an important part of air quality throughout your home. Change furnace and air conditioning filters every 1-3 months based on usage and filter type. Consider having professional HVAC maintenance done once a year to maintain proper operation and to avoid mold and bacteria growth in ducts and parts.
Deep Cleaning vs. Regular Cleaning: When Do You Need It?
It is vital to understand the distinction between day-to-day cleaning and deep cleaning to have a truly healthy home. Here is what to look out for:
Difference Between Daily and Deep Cleaning
Regular or daily cleaning is all about surface cleanliness and hygiene – wiping down counters, vacuuming the floors, and cleaning up loose dirt and debris. This maintenance cleaning is important but doesn’t touch on ingrained dirt or unseen bacteria.
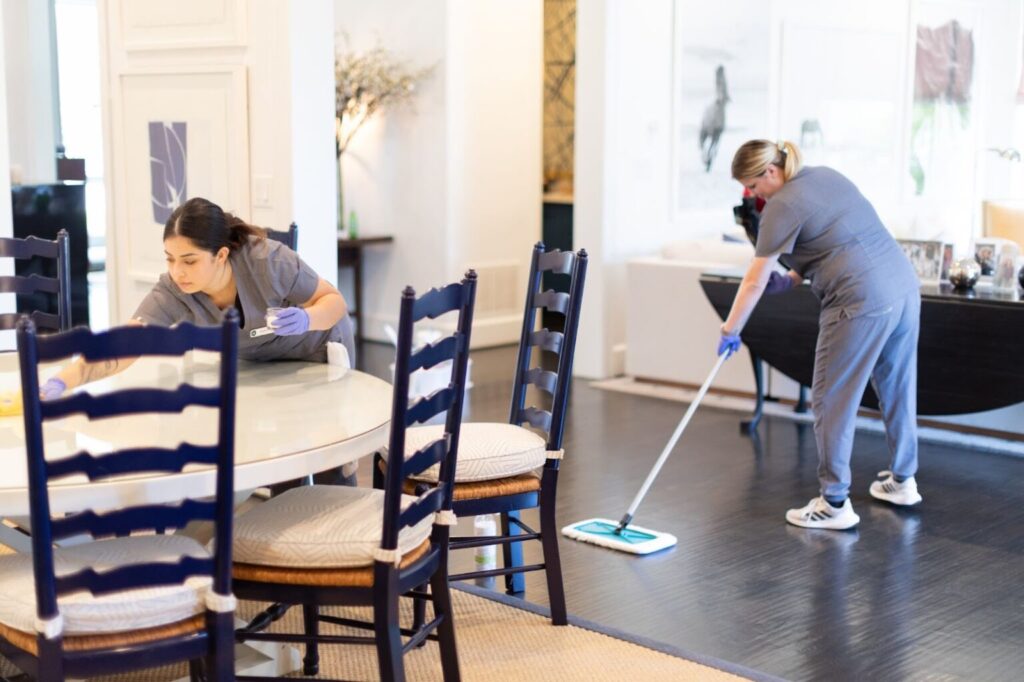
Deep cleaning, on the other hand, constitutes extensive, full-scale cleaning of all surfaces, including frequently overlooked areas such as baseboards, ceiling fans, behind appliances, and within cabinetry. Deep cleaning services conducted by Vella in Texas customarily wet-wipe all of the doors, frames, knobs, and switch plates; dust ceiling fans and light fixtures; thoroughly vacuum rugs; scrub and sanitize all of the bathroom surfaces; and fastidiously clean all interior glass.
Time for Deep Cleaning:
- Once a member of the household has been sick, a professional deep clean can remove residual pathogens.
- Seasonal changes offer perfect times for deep cleaning – spring cleaning to get rid of winter’s built-up dust and fall cleaning to ready for increased indoor time.
- Also, prior to or following guests, a deep cleaning makes your home presentable and sanitary.
Vella’s service can be availed from various parts of Texas including Plano, Austin, Dallas, and Fort Worth. Reach out to us for a deep cleaning of your home to remove all the germs and viruses.
Germ-Free Home Checklist: Keep Your Family Safe
Having a germ-proof home calls for ongoing effort and tactical attention. We’ve put together this practical checklist to ensure your cleaning routine is prioritized.
Everyday Tasks:
- Sanitize high-touch areas such as doorknobs, light switches, remote controls, and electronic equipment
- Clean kitchen counters following food preparation
- Sanitize bathroom surfaces, particularly faucet handles and toilet flush levers.
Weekly Activities:
- Change and wash bed linens, bath towels, and kitchen towels in hot water
- Vacuum and mop all floors with the correct cleaners for each surface
- Clean refrigerator interior, disposing of expired food.
Monthly Tasks:
- Deep clean appliances such as microwave, oven, and dishwasher
- Vacuum furniture with upholstery, including under cushions
- Wash pillows and duvet covers.
Vella: The Best Way to Stay Protected
Though daily cleanliness is of utmost importance, complementing this with a professional deep cleaning service adds a further level of security for your home. Here at Vella, we are experts at thorough cleaning that extends to those usually neglected areas where viruses and germs have the potential to build up. Our housekeepers are equipped to spot and rectify potential trouble spots, employing the correct disinfection procedures for various surfaces and materials.
Our method of deep cleaning services in Austin blends the most attentive detail with productive, quality cleaning products. We know that every home is different, so we employ a specialized algorithm to create individualized cleaning plans that are geared specifically to your living environment.
It does not have to be daunting to keep your home free from germs and viruses. With proper knowledge, regular habits, and the occasional professional touch, you can have a healthier living space for yourself and your family. To feel the difference that professional deep cleaning can make, go to our website to find out more about our services and book your personalized cleaning today!