An organized pantry can save the average household anywhere from $1,500 per year by eliminating food wastage and redundant purchases. Aside from cost savings, a tidy pantry revolutionizes your cooking experience, saving you time and effort spent in the kitchen. We’ve all gone through the agony of hunting for ingredients hidden behind cans of out-of-date items or struggling with a snowdrift of items when looking for just one thing. 

In this ultimate pantry makeover guide, we’ll take you through the step-by-step process of turning your cluttered pantry into a functional, beautiful space that will make your kitchen life far more convenient.

Step 1: Decluttering – The First Step to a Clean Pantry

Before we get to organizing, we must begin with a blank slate. Decluttering is key to building a pantry system that truly functions for your family.

“Begin by clearing everything out of your pantry,” advises professional organizer Naeemah Ford Goldson. This step is always really eye-opening because it makes you see the entirety of what you have, which is always more than you realize!

As you take out items, use three separate lists: keep, donate, and discard. Take no mercy on expired products – in the opinions of food safety professionals, several items deteriorate long before reaching their “best by” labels. 

Look for:

  • Products well beyond their dates
  • Almost bare containers of little-used items
  • Food products that you bought but never actually employed (be sincere with yourself!)
  • Duplicates you hadn’t known that you had

This method assists you in determining what you truly need and utilize on a regular basis. A clean pantry begins with having only what caters to your lifestyle and eating habits at present. For food still edible but not likely to be consumed in your home, donate to food banks in your area to save from waste while assisting others, making room for the best foods to eat that actually support your health and daily meals.

Step 2: Deep Cleaning Your Pantry Shelves

Once your pantry has been emptied, the time is right for some thorough cleaning. We find it best to begin at the top and then work your way down because dust and debris will naturally drop onto lower surfaces.

  • First, vacuum with a hose attachment to get rid of crumbs, dust, and cobwebs in corners and crevices. Then, mix up a cleaning solution with warm water and an all-purpose cleaner – roughly one tablespoon of cleaner to a small bucket of water. For a natural option, combine one part vinegar with two parts water.
  • Second, soak a microfiber cloth in your solution, wring it until it’s not dripping, and wipe down every shelf carefully. Be sure to pay extra attention to sticky spill residue. For tough spots, allow your cleaning solution to sit for a few minutes before wiping.
  • Don’t miss cleaning the wall, door, and floor of your pantry area. In case you see some mold or mildew, disinfect the area with a disinfectant solution according to label instructions.

After everything is dry and clean, think about using shelf liners – they will make your future cleaning easier and keep your shelves safe from spills and stains.

Step 3: Smart Shelf Organization Strategies
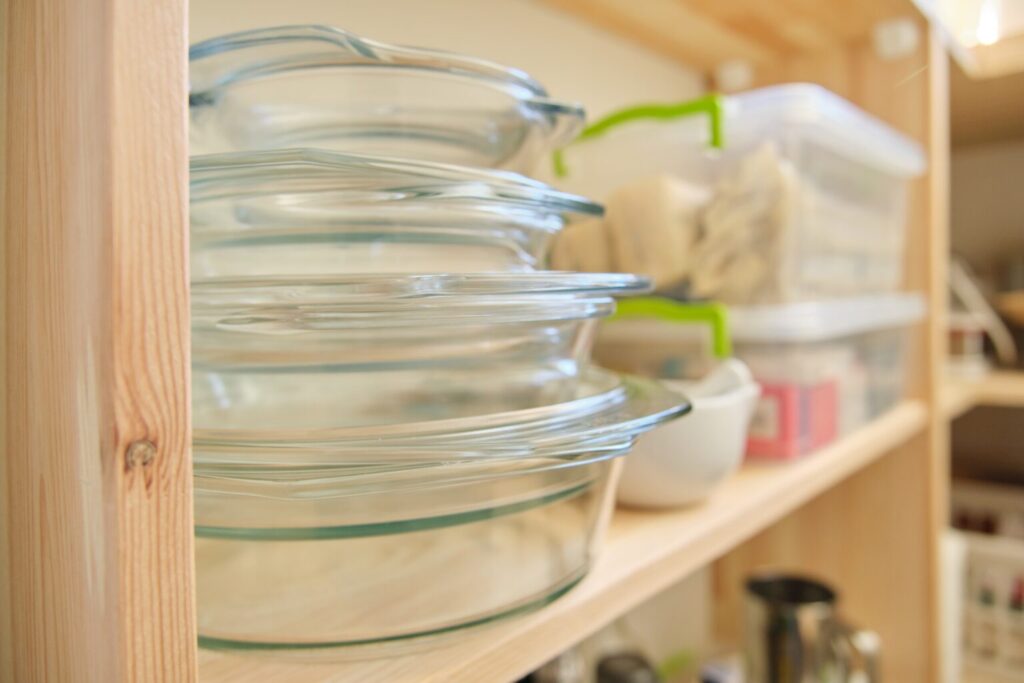
Neatly organized pantry shelves in Dallas with glass containers of dry goods stacked by category.

Organization is more about designing intuitive systems that work for the way you function in your kitchen. Instead of organizing by container size, we suggest grouping similar items by category or “zones.” 

“Stacking things together that are roughly the same size and shape might save space, but it won’t enable you to find what you need quickly when you need it,” says Goldson. “Stack your edibles instead into themed groups.”

Here’s how to organize your shelves for maximum efficiency by dividing them into categories: 

  • Baking supplies (flour, sugar, baking soda)
  • Breakfast items (cereal, oatmeal, pancake mix)
  • Pasta and grains
  • Canned goods (sorted by type)
  • Snacks
  • Condiments and sauces

Invest in clear containers for items like pasta, rice, cereal, and baking supplies. This approach not only creates a visually appealing pantry but also extends food freshness and makes it easy to see when supplies are running low.

Labeling is important – even with transparent containers, labels assist everyone in the home in keeping the system intact. Utilize a label maker or plain masking tape and a marker to clearly label contents and expiration dates.

Step 4: Maximizing Small Pantry Spaces

Not everyone can afford a walk-in pantry, but even the tiniest areas can be extremely functional with the right mindset. The solution lies in going vertical and making every inch count.

Place stackable shelf organizers to double your usable surface. These metal or plastic inserts create instant extra layers of storage without the need for renovation. Door-mounted organizers provide another space-saving option ideal for spices, oils, or small packaged goods.

“For items wrapped individually, such as granola bars or juice boxes, utilize baskets. For loose foods like flour or cereal, utilize canisters,” recommends professional organizer Rose Lounsbury.

Consider these other space-saving techniques:

  • Use lazy Susans in corner areas to cut down on unreachable “dead zones.”
  • Add pull-out drawers for easier access to deep shelves
  • Hang the most-used tools inside the cabinet doors
  • Make use of adjustable shelf heights to store items of varying sizes
  • Group rarely used specialty items in the upper or lower shelves

Keep in mind that visibility is usability. Products abandoned at the rear of deep shelves tend to expire before being used, leading to food waste and inefficiency.

Step 5: Maintaining a Clean and Organized Pantry

Putting a gorgeous pantry together is one success – keeping it up is a different story. We suggest taking a few simple steps to sustain your pantry order in the long term.

Keeping your pantry clean and organized with a speedy 10-minute process every week:

  • Put misplaced items into their correct spots
  • Clean up any sticky shelves or spills
  • Bring back stock to the front based on freshness dates
  • Write down low-on-stuff stuff for your grocery list

Do a deeper clean every quarter, which professionals suggest doing with the change of seasons. This involves ensuring expired products are removed, cleaning shelves, and re-evaluating your organization’s method.

You must clean your pantry a minimum of four times a year when the seasons change. At least try to do it twice every year.

Implement a “first in, first out” system where newer products go behind older ones so that older products are used up before they expire. This easy habit significantly minimizes food waste and keeps your tidy pantry running at peak performance.

Vella’s Expert Cleaning Services: How We Can Help

While these DIY methods will reshape your pantry, sometimes professional hands do make a difference. Our professional housekeepers at Vella realize that a spotlessly clean pantry is more than exterior appearances. Our thorough cleaning procedures guarantee that all areas of your kitchen, pantry areas included, are given careful attention.

Our housekeepers utilize non-toxic, eco-friendly cleaning materials that are good at their job without being harmful in food storage spaces. When you choose Vella, you have no need to worry that your pantry will be cleaned by products that value your health as well as the planet.

When in doubt, call Vella to organize your pantry. We extend our services across Texas, including areas such as Dallas, Austin, and Fort Worth

Vella cleaning staff in Austin standing beside company van with eco-friendly cleaning supplies.

Organize Pantry Like a Pro

An organized pantry is not only an aesthetic decision – it’s a practical approach to minimizing food waste, saving money, and streamlining meal preparation. By reading our step-by-step guide, you can turn this important area in your kitchen from a source of frustration into a source of pride.

Keep in mind that organization systems do best when they are tailored to your home’s particular needs and routines. The ideal pantry isn’t always going to be the one with coordinated containers and immaculate labels (although those are nice!) – it’s the one that works in harmony with your life.

Ready to give your whole kitchen the next level of clean? We’re here to assist. Find your ideal clean with Vella’s outstanding housekeeping services that leave more than a fresh aroma – they leave a lasting memory.

Stains on couches naturally appear due to unintentional spills, regular usage, and pet activities. While stains on furniture can be a bit frustrating, the good part is that professional cleaners can eliminate various types of stains with the right cleaning methods.  However, using the wrong cleaning procedures may cause existing stains to worsen or even a permanent change in color. 

In this blog, we will discuss how to understand the fabrics, various cleaning methods, tips, and the right cleaning solutions. Keep reading the ultimate guide to removing stains from couch cushion covers.

Understanding Fabric Cleaning Codes Before You Start 

The manufacturers provide upholstery cleaning codes to specify proper cleaning approaches because different fabrics need different cleaning treatments. Before cleaning, it is essential to check the cleaning codes on fabric tags to prevent any damage. 

What Are Upholstery Cleaning Codes?

The cleaning codes that specify fabric cleaning instructions will typically be found on the tags of your couch. These are known as upholstery codes. 

Most couch tags include one of the following codes:

  • W: The fabric type labeled W allows cleaning with water-based solutions.
  • S: Use a solvent-based cleaner (water can damage this fabric).
  • WS: Safe for both water-based and solvent-based cleaners.
  • X:  Vacuum only; no liquid cleaning solutions.

How to safely test a cleaning solution on your couch fabric

Doing a spot test is crucial even if the method passes your fabric requirements.

  • First, apply a tiny amount of the solution on an area that cannot be easily seen.
  •  Then, let the solution sit for ten to fifteen minutes, then check for any fabric damage.

If no negative reaction occurs, proceed with cleaning.

Best Methods to Remove Common Stains from Couch Cushion Covers

The process of removing different stains needs specific methods of treatment. Couch-staining removal methods are presented in this section for typical stains that appear on couch cushions.

How to Remove Food and Grease Stains from a Sofa?

Food and grease stains are difficult to remove as they can not be easily dissolved by water. Here’s the easiest way to get rid of them:

  • Blot the stain: Use a paper towel to absorb excess grease (don’t rub!).
  • Apply dish soap: Mix dish soap with warm water and dab the stain using a microfiber cloth.
  • Use baking soda: Sprinkle baking soda over the stain, let it sit for 15–20 minutes, then vacuum it up.
  • Repeat or use an upholstery cleaner: If needed, apply a mild upholstery cleaner.

Removing Coffee, Wine, and Beverage Stains

Removing coffee, wine, and other stains can be a daunting task. Here is a step-by-step guide to help you remove these stains from your furniture: 

Step 1: Start by using a fresh cloth that removes maximum liquid before it can settle in.

Step 2: For natural stain removal, try mixing equal parts of vinegar, dish soap, and baking soda. Apply this solution to the stained area, after waiting for ten minutes, clean it off with a damp sponge.

Step 3: Select an upholstery beverage stain cleaner as an alternative treatment if required.

How to Get Rid of Ink and Marker Stains on a Couch

Here is how to remove ink stains from your couch.

  • For alcohol-based ink stains: Dab rubbing alcohol on a cotton swab and gently blot the stain.
  • For water-based ink stains: Mix dish soap with warm water and blot the stain.
  • For marker stains: Use a magic eraser carefully to lift the stain.

Removing Pet Stains and Odors

Pet stains often require more than surface cleaning:

  • Use an enzymatic cleaner: These break down stains (especially urine) at the molecular level.
  • Wash removable covers: If possible, remove and wash the cushion covers separately.
  • Apply a fabric protector: Prevent future stains with a fabric-protecting spray.

DIY Solutions vs. Store-Bought Stain Removers – What Works Best?

When it comes to stain removal, DIY solutions like vinegar and baking soda can be effective for light stains, offering a natural and budget-friendly alternative. However, they may not be strong enough to tackle deep-set or stubborn stains. For more challenging messes, store-bought upholstery cleaners provide a more powerful solution, specifically designed to break down tough stains without damaging the fabric.

That said, not all cleaning products are safe for your couch. Harsh chemicals like hydrogen peroxide should be avoided, as they can weaken the fabric and cause discoloration. Choosing the right cleaning method depends on the severity of the stain and the material of your couch.

At Vella, we always recommend non-toxic, eco-friendly cleaning products. Brands like Bon Ami and Branch Basics offer green cleaning products. 

How to Clean Removable vs. Non-Removable Couch Cushion Covers 

Keeping your couch cushions clean not only extends their lifespan but also maintains a fresh and inviting living space. Whether your couch cushions have removable covers or are fixed in place, proper cleaning techniques can help remove stains, eliminate odors, and prevent fabric damage. Below is a step-by-step guide to safely clean both machine-washable and non-removable couch cushion covers.

Machine-Washable Covers – How to Clean Them Safely

If your couch cushion covers are removable and machine washable, cleaning them is a breeze. However, to avoid fabric damage or shrinkage, follow these steps carefully:

  • Check the Care Label: Before washing, read the fabric care label to determine the recommended water temperature and cleaning products. Some covers require cold water washing or delicate cycles.
  • Use Gentle Detergent: Opt for a mild detergent that won’t weaken the fabric fibers. Avoid bleach or harsh chemicals that can cause discoloration or fabric deterioration.
  • Wash on a Gentle Cycle: Place the covers in the washing machine on a gentle or delicate cycle to prevent excessive wear and tear.
  • Air Dry: Instead of using a dryer, lay the cushion covers flat or hang them to air dry. This prevents shrinkage and maintains the original fit.
  • Iron If Necessary: If wrinkles form, use a low-heat iron to smooth out the fabric before putting the covers back on the cushions.

Cleaning Couch Cushions Without Removable Covers

For cushions without removable covers, cleaning requires a more hands-on approach. Since these covers cannot be machine washed, follow these steps to maintain cleanliness and remove stains effectively:

  • Spot Clean Small Stains: Use a damp microfiber cloth with a gentle upholstery cleaner to blot stains. Avoid rubbing, as this can spread the stain further.
  • Steam Clean for Deep Cleaning: If your couch fabric allows, use a steam cleaner to lift embedded dirt, bacteria, and allergens from the fabric. This method is highly effective for maintaining freshness.
  • Deodorize with Baking Soda: Sprinkle a thin layer of baking soda over the cushions and let it sit for at least 15 minutes before vacuuming. This helps neutralize odors and absorb excess moisture.
  • Vacuum Regularly: Use an upholstery attachment to vacuum the cushions at least once a week to remove dust, pet hair, and debris.
  • Call Professionals When Needed: If DIY cleaning methods don’t work or the stains persist, consider hiring a professional upholstery cleaning service for deep stain removal and fabric protection.

Preventing Future Stains

The best way to keep your couch cushions looking fresh is by taking preventive measures. Here’s how to protect them from future spills and stains:

  • Apply Fabric Protector: Using a fabric protector spray creates a barrier that repels spills and stains, making cleanup easier.
  • Vacuum Weekly: Regular vacuuming prevents dirt and dust from settling into the fabric.
  • Tackle Spills Immediately: The sooner you clean up a spill, the less likely it is to stain. Blot (don’t rub) spills right away with a clean cloth.
  • Use Washable Slipcovers: If you have pets or small children, consider using washable slipcovers to add an extra layer of protection.

By following these cleaning and maintenance tips, you can keep your couch cushions looking spotless and fresh for years to come!

Vella cleaning crew in Austin with eco-friendly supplies and equipment for professional couch stain removal services.

Stain Removal FAQs – Your Questions Answered 

Q1. Can I use baking soda for stain removal on a couch?

Yes! Baking soda is effective when it comes to removing grease and is also a strong odor-neutralizing agent.

Q2. How do I remove dried stains from a fabric couch?

Using a solution containing dish soap, vinegar, and warm water proves effective for stain removal. For stronger stains, you should use an upholstery cleaner.

Q3. What is the best home remedy for couch stain removal?

Vinegar and baking soda are effective for most stains.

Q4. How do I deep clean my couch cushions?

Vacuum regularly, spot clean stains immediately, and use a steam cleaner for deep cleaning.

Vella: Professional Cleaning Service 

Sometimes, DIY stain removal methods just aren’t enough. In case of stubborn stains or delicate fabrics, always opt for professional cleaning services. Vella offers deep cleaning services across Texas, including Austin and Dallas

Benefits of professional deep cleaning services:

  • Deep stain removal – Professionals use industrial-grade cleaning solutions.
  • Safe for delicate fabrics – Reduces the risk of damage.
  • Removes allergens and bacteria – Improves indoor air quality.

Need a refresh for your home? Expert deep cleaning services can tackle stains, dirt, and allergens. Schedule a cleaning today!