How to Remove Burnt Food from Utensils: Simple Tips

Cooking is an art and a science, but even the best chefs occasionally find themselves with burnt food stuck at the bottom of their pots and pans.. This is an annoyance; cleaning is tedious and damages cookware when left unattended. Learning to remove burnt food is essential for preserving the lifespan of your utensils and keeping the kitchen clean.
Let’s explore the various ways to remove burnt food from the utensil.
Why Burnt Food Sticks: Understanding the Science
When heat is applied during cooking, food undergoes chemical changes. It can break down proteins and carbohydrates when overheated and form strong attachments to the cookware’s surface. This process, known as the Maillard reaction, causes food to brown and form stubborn, baked-on residues that cling to pots and pans.
The type of cookware and the amount of oil used play an important role too. Nonstick surfaces are designed to lessen food adhesion, while metal surfaces like stainless steel and cast iron could adhere more closely when not seasoned or sufficiently oiled.
Moreover, burnt food leaves unsightly stains and lingering smells, making the utensils unappealing and possibly affecting the taste of future dishes.
Quick and Easy Methods: The Best Ways to Tackle Burnt Food
Numerous methods have been used over the years to remove burned utensils. Here are some proven ones that hold for us:
Boiling Water Method
This is almost always the first option for burnt-on food. Here’s how to do it:
-
- Fill the Utensil with Water: Just enough water to cover the burned part.
-
- Bring to a Boil: Place the utensil on the stove and turn up the heat until the water comes to a rolling boil.
-
- Simmer: Allow it to boil for a few minutes. The heat helps loosen the burnt particles.
-
- Scrape Off Residue: Once the burner is off, use a wooden or silicone spatula to scrape off food particles that have been detached.
-
- Final Wash: Wash the utensil with warm, soapy water once most residues have been removed.
Soaking with Soap
Soaking with soap works wonders when you have a more stubborn burn:
-
- Add Dish Soap: Pour a generous amount of dish soap inside the burnt utensil.
-
- Fill with Hot Water: Pour hot water to cover all affected parts.
-
- Let it Sit: Soak it for several hours or overnight. This will help dissolve burnt food.
-
- Scrub Away Residue: Remove the weakened residue with a non-abrasive scrubber.
-
- Rinse and Dry: Rinse thoroughly with clean water and dry immediately to prevent water spots.
Cleaning Utensil by Scrubbing with Baking Soda
Baking soda is one of the most versatile cleaning agents in our kitchen. It has a slightly abrasive characteristic. Here is how to use baking soda to clean your utensils:
-
- Make Paste: Combine a little water and baking soda to create a thick paste.
-
- Apply to Burnt Areas: Spread the paste over the burnt sections of the utensil.
-
- Let it Sit: Allow it to penetrate the residue for 15-20 minutes.
-
- Scrub Gently: Circularly scrub the area using a soft sponge or cloth.
-
- Rinse and Clean: Rinse off the baking soda and wash the utensil with dish soap to remove any residue.
Using Natural Cleaning Agents: Gentle and Effective Solutions
We recommend using natural cleaners and have found several effective methods for doing so, including the following:
Vinegar and Water
Vinegar is one of the best cleaning agents because of its acidity:
-
- Prepare the Solution: Mix equal parts of white vinegar and water in the burnt utensil.
-
- Heating: On the stove, bring the solution to a boil.
-
- Cooling: Remove from heat and allow it too cool slightly.
-
- Scrubbing: Use a sponge to scrub the now-loosened burnt food.
-
- Washing: Rinse and wash with soap in order to remove any smell of vinegar.
Lemon Juice
This is also a natural acid that can help in cleaning:
-
- Pouring Lemon Juice: Squeeze fresh lemon juice onto the burnt portions.
-
- Let it Settle: Let it sit for about 30 minutes.
-
- Scrubbing: Use soft scrubber for scrubbing the residue.
-
- Rinse and Dry: Rinse with warm water and dry.
Salt Scrub
When used in scrubbing, it serves as a mild abrasive:
-
- Sprinkling Salt: Generously sprinkle coarse salt over the burnt area.
-
- A Bit of Water: Add a bit of water to make a slurry.
-
- Gentle Scrub: Gently scrub using a sponge or cloth.
-
- Rinse and Clean: Wash off the salt from the utensils. Rise once again.
Using Commercial Cleaners: When to Use Chemical Solutions
Sometimes a commercial non-toxic cleaner must be used for nasty burns. Let’s look at some of the pros and cons of commercial cleaners:
Pros and Cons of the Commercial Cleaners
Pros:
-
- Efficient: These can break harsh burnt residues very quickly.
-
- Convenient: Readily available and easy to use.
Cons:
-
- Harsh Chemicals: They may have ingredients that are fatal when improperly used.
-
- Potential Damage: Abrasive and damaging for certain cookware surfaces.
Dishwashing Soap and Baking Soda
Dishwashing soap and baking are a good combo to purify burnt stains. Here is how to use it:
-
- Sprinkle Baking Soda: Sprinkle baking soda over the burnt area.
-
- Add Dishwasher Detergent: Sprinkle some powdered dishwasher detergent on the baking soda.
-
- Add Hot Water: Pour very hot water over the mixture.
-
- Let it Sit: Let it soak for several hours or overnight.
-
- Scrub and Rinse: Scrub and rinse well.
Oven Cleaner or Grill Cleaner
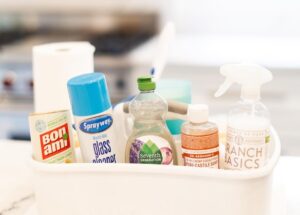
For very stubborn burns, you may apply heavy-duty cleaners, like Bon Ami:
-
- Apply the Cleaner: Spray the cleaner onto the burnt areas.
-
- Let it Sit: Follow the manufacturer’s recommended time.
-
- Scrub Carefully: Using a nonabrasive scrubber, clean the area.
-
- Wash Thoroughly: Rinse several times and wash with soap to remove chemical residues.
Caution: Always wear gloves and ensure proper ventilation when using chemical cleaners. Do not use them on non-stick or delicate surfaces; they can damage them.
How to Prevent Burnt Food Build-Up in the Future
Quality Cookware can make a Difference:
-
- Non-Stick Cookware: They reduce the tendency of food to stick and burn.
-
- Properly Maintain: Regularly season cast iron and stainless steel pans to build a natural non-stick surface.
Proper Cooking Techniques
A proper cooking technique is the beginning of preventing burnt food. Here are some of the methods that we have found helpful:
-
- Control the Temperature: High heat burns food quickly. Start cooking on low to medium heat and gradually increase it. This method usually prevents burning because of even cooking but keeps on checking.
-
- Stirring: Foods must be stirred regularly to prevent them from sticking to the pan and burning. This is especially important in dishes like sauces or stews.
-
- Using Timers: Use a timer to track cooking time to avoid overcooking. This is very important when you are doing other things in your kitchen.
-
- Preheating Cookware: Preheating pans before adding food can help prevent them from sticking and burning.
-
- Choosing the Right Cookware: choosing the right cookware for specific cooking can make a lot of difference. For instance, a carbon steel wok is excellent for stir-frying owing to its heat distribution properties.
Following these techniques would help reduce the chances of burning food, all while maintaining that fantastic quality of meals.
Routine Cleaning: The Importance of Immediate Cleaning After Cooking
Cleaning utensils immediately after use is imperative because of the following reasons:
-
- Prevents Residue Buildup: If utensils are cleaned right away, food particles will not harden, making them easier to clean.
-
- Maintain Cookware Quality: Regular cleaning ensures that cookware is not ruined by residues burned on it.
-
- Hygiene: Cleaning up quickly prevents bacteria from breeding, ensuring that your utensils are not germ-infested.
Developing a habit of cleaning the kitchen as you go prevents overwhelming messes and keeps it in top condition.
Best Tools for Cleaning Burnt Utensils
Having appropriate tools can make it all easier when cleaning burnt utensils:
-
- Non-Abrasive Scrubber: These soft scrubbers remove burnt food without scratching cooked surfaces. We highly recommend Scrub Daddy.
-
- Cleaning Sponges: Such sponges can tackle burnt residues most effectively because of their different levels of abrasiveness.
-
- Scrub Brushes: These sturdy-bristled brushes reach into crevices to remove burnt food particles that would otherwise be difficult to remove.
Using suitable cleaning tools removes residues effectively and maintains a good condition for your cookware.

Keeping Your Kitchen and Home Clean
Effective cleaning relies on understanding why food sticks, using quick and natural cleaning methods, and having the right tools. Prevention, such as knowing how to cook correctly and doing routine cleanings, is key to maintaining utensil life and longevity.
If burnt food is too persistent or you cannot afford the right time to clean it properly, let Vella Cleaning Service at Austin do it for you. Book us today to get your painless cleaning session!